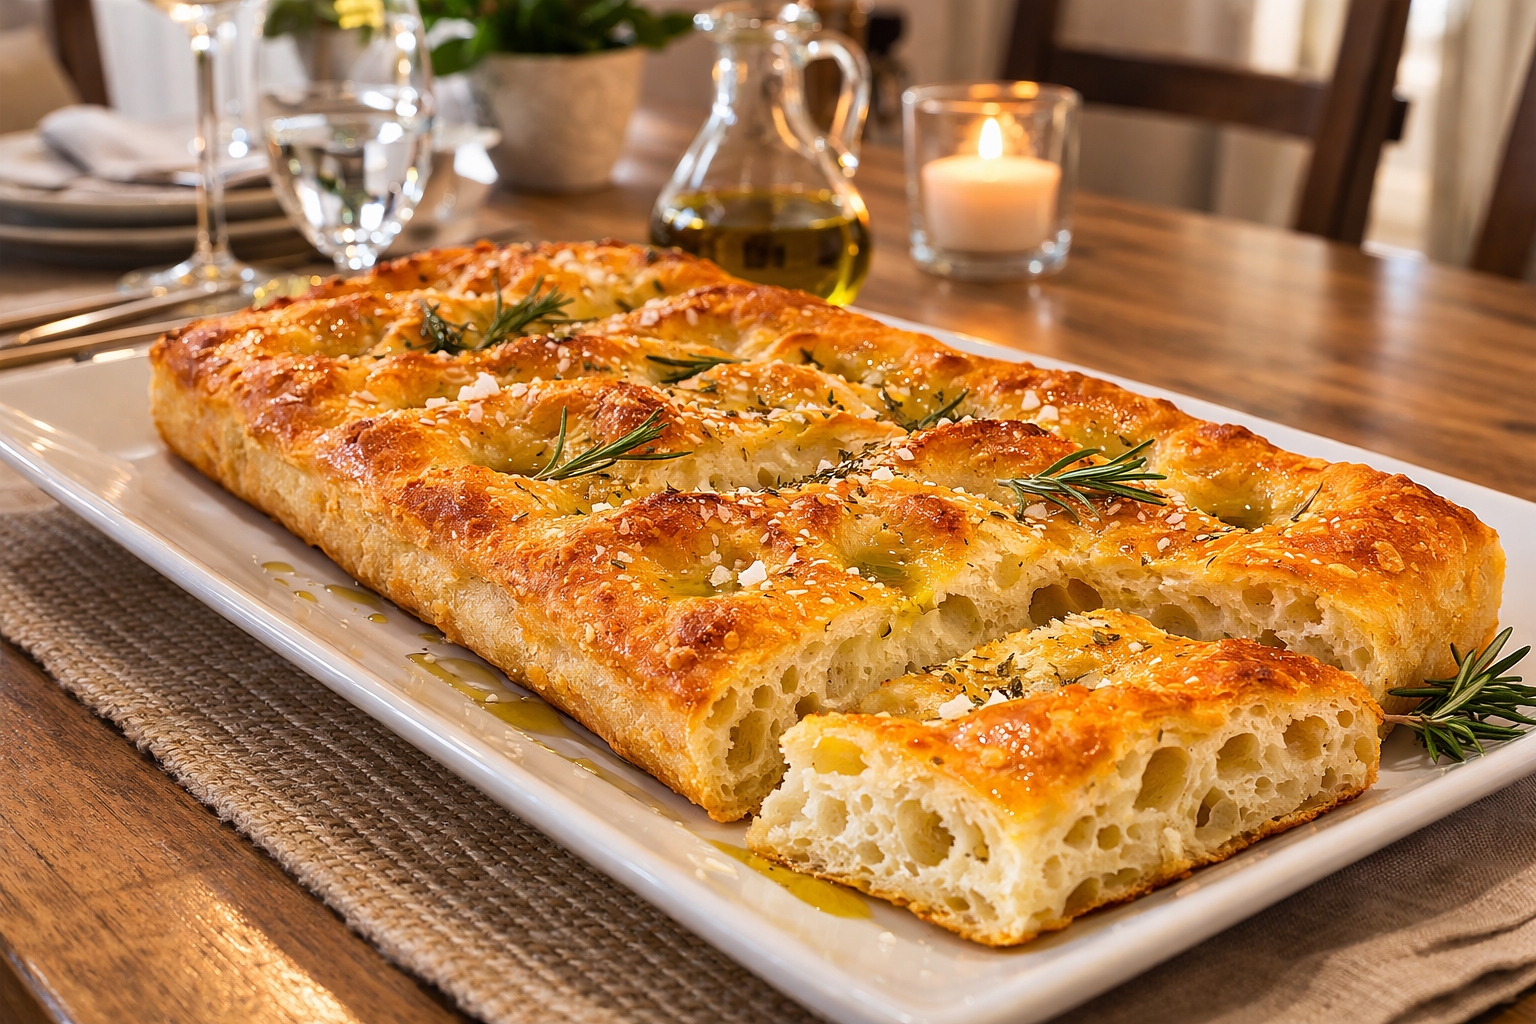
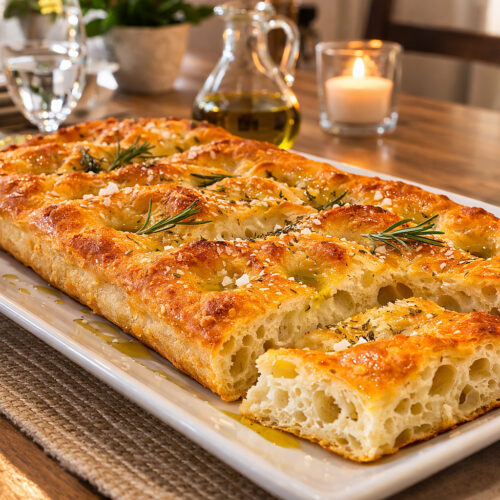
This focaccia bread with sponge method produces a light crumb, rich flavor, and crisp olive-oil crust.
Introduction
This focaccia bread with sponge is one of my favorite ways to bake traditional Italian bread at home. Because the sponge ferments overnight, the dough develops a deeper flavor and a lighter crumb compared to quick focaccia recipes.
In addition, using Manitoba flour helps the dough build a strong gluten structure. As a result, the bread holds fermentation gases better and produces a soft interior with a crisp olive-oil crust.
Moreover, this method relies on gentle coil folds instead of aggressive kneading. Consequently, the dough keeps more air inside, which leads to the open crumb typical of high-quality focaccia.
Later in this article, you will find a link to the complete focaccia bread recipe with sponge in the WP Recipe Maker card, along with practical tips that help you bake it successfully.
What Makes Focaccia Bread with Sponge Unique
Focaccia is a classic Italian flatbread known for its soft interior and golden crust. Traditionally, bakers press dimples into the dough before baking. These small indentations hold olive oil, herbs, and salt while also helping the dough bake evenly.
Furthermore, focaccia is extremely versatile. While some bakers prefer a simple olive-oil and sea-salt topping, others add vegetables, herbs, or olives.
Key Characteristics of Focaccia Bread with Sponge
- light, airy crumb
- crisp olive-oil crust
- deeply dimpled surface
- fragrant Mediterranean toppings
Although focaccia originates in Liguria in northern Italy, bakers now prepare it around the world.
Why Focaccia Bread with Sponge Improves Flavor and Fermentation
Many experienced bakers prefer using a sponge because it strengthens fermentation and improves flavor. Since the sponge ferments before the final dough is mixed, yeast activity increases significantly.
Consequently, the dough becomes easier to handle and develops a better crumb structure.
Benefits of the Sponge Method for Focaccia Bread
- deeper bread flavor
- stronger fermentation activity
- improved gas retention
- lighter crumb texture
In addition, sponge fermentation reduces the need for excessive yeast in the final dough.
Why Manitoba Flour Works So Well
Manitoba flour is known for its high protein content. Because of this strength, the dough forms a stable gluten network capable of trapping fermentation gases.
As a result, focaccia made with Manitoba flour often produces a better rise and a more open crumb.
Advantages of Manitoba Flour
- strong gluten structure
- excellent dough elasticity
- improved oven spring
- better gas retention
Therefore, Manitoba flour is particularly helpful when preparing doughs that ferment for several hours.
Why Coil Folds Are Effective
Instead of kneading the dough aggressively, this method uses coil folds. This technique gently stretches and folds the dough over itself, strengthening gluten without damaging the internal gas structure.
Consequently, the dough becomes smoother while still preserving fermentation bubbles.
Why Coil Folding Works Well for Focaccia with Preferment
- gentler dough handling
- stronger gluten development
- improved crumb structure
- better fermentation control
Because of these advantages, many professional bakeries use coil folds for high-hydration breads.
Choosing the Right Pan for Focaccia Bread with Sponge
Selecting the correct pan size influences both the crumb structure and final thickness of focaccia. For most home ovens, a medium rectangular pan works very well.
Recommended Pan Size
A 25 × 40 x 5 pan provides enough space for the dough to expand while still producing the ideal thickness.
Expected Dough Thickness
- before proofing: about 1–1.5 cm
- after proofing: about 2–2.5 cm
- after baking: about 2.5–3 cm
Because of this thickness, focaccia develops both a light crumb and a crisp bottom crust.
Practical Tips for Better Focaccia Bread with Sponge
Although focaccia is a simple bread, several small details significantly improve the final result.
Use Enough Olive Oil
Olive oil prevents sticking and creates the classic crisp base.
Allow the Dough to Relax
If the dough resists stretching in the pan, wait a few minutes before trying again. This relaxation step prevents tearing.
Watch the Final Proof Carefully
Before baking, the dough should look:
- puffy
- slightly jiggly
- full of small bubbles
These signs indicate strong fermentation.
Handle the Dough Gently
Press dimples firmly but carefully. Excess pressure can release the fermentation gases that create the airy crumb.
Recognizing When the Sponge Is Ready for Focaccia Bread
A sponge should clearly show fermentation activity before mixing the final dough.
Signs of a Ready Sponge
- 70-100% increase in volume
- many small bubbles
- slightly domed surface
- pleasant yeasty aroma
When the dome begins to flatten slightly, the sponge is at peak fermentation.
Complete Focaccia Recipe
The full ingredient list, folding schedule, and baking instructions are available in the recipe card below.
Focaccia with Sponge and Coil Folds (Manitoba Flour)
Ingredients
Sponge (8 hours @ ~20°C)
- 250 g Manitoba flour
- 225 g water 22–24°C
- 1/4 tsp instant yeast
Final Dough
- 318 g Manitoba flour
- 207 g water
- 11 g salt ≈ 1¾ tsp
- 5 g sugar optional, ≈ 1 tsp
- 18 g olive oil ≈ 1½ tbsp
- 1/8 tsp instant yeast
Pan & Topping
- 40 g olive oil pan
- 20 g olive oil top
- flaky sea salt
- optional toppings
Instructions
Sponge
- Mix flour + yeast + water
- Transfer to lightly oiled container (optional)
- Cover and ferment ~8 hours at 20°C (room temperature)
- Ready when bubbly and doubled in size
Mix Final Dough
- Lightly oil bowl
- Add sponge + flour + water (hold back 20 gr of water)
- Mix until hydrated
- Add salt + olive oil
- Mix until smooth, elastic, sticky
- Now add remaining 20 gr water while mixing
Rest
- 50 minutes, then start the folding to introduce gas in the dough and strengthen the gluten
Folds
- Fold #1, rest 25 minutes
- Fold #2, rest 25 minutes
- Fold #3, rest 25 minutes
- Dough becomes smooth and elastic
Pre-Fridge Rise
- Allow dough to rest and rise 20 to 30%
Cold Fermentation
- Refrigerate 12–16 hours
Next Day
- Remove from fridge, allow dough to reach room temperature (45-60 mins.)
Pan Prep
- Line baking pan with parchment paper (bottom + sides)
- Brush paper with 35–45 g olive oil
- Gently transfer the dough to the pan, let rest 20 minutes
- Lift dough from the bottom and stretch to shape into pan
Final Proof
- Allow 60–90 minutes for dough to rise
- Ready when:: very puffy, jiggly and bubbly (lots!)
Prepare for Baking
- Add 15–20 g olive oil to doughOil your gloves or hands and dimple the dough very gentlySprinkle with salt or any other topping of choice
- Rest 10–15 minutes
Bake
- Preheat oven to 220°C (no steam)
- Place on preheated stone (if available), bake for 22-25 minutes
Cool
- Remove from pan
- Remove parchment paper and cool 45–60 minutes on rack
- If using a baking stone, return to stone 2–3 min for extra crisp bottom
Notes
- Using a sponge preferment improves flavor and fermentation strength.
- Manitoba flour provides strong gluten structure and good gas retention.
- Coil folds strengthen the dough gently while preserving bubbles.
- If the dough resists stretching in the pan, allow it to rest 10 minutes before stretching again.
- Sugar is optional and helps with browning and yeast activity.
Serving Ideas
Fresh focaccia pairs well with many dishes. Because of its olive-oil-rich crumb, it complements both simple and hearty meals.
Ways to Serve Focaccia
- alongside soups or salads
- as sandwich bread
- dipped in olive oil and balsamic vinegar
- topped with herbs, olives, or tomatoes
Storage Tips
Proper storage helps maintain the texture and flavor of focaccia.
Best Storage Methods
- room temperature for up to two days
- wrapped tightly in foil or plastic
- frozen slices stored up to one month
Reheating Frozen Focaccia
To restore crispness:
- preheat the oven to 200 °C
- bake for 5–8 minutes
Because this focaccia bread with sponge relies on slow fermentation, the dough develops excellent flavor and structure.
Final Thoughts
Focaccia bread made with a sponge offers both excellent flavor and a light crumb. Because the preferment strengthens fermentation, the dough becomes easier to handle and more predictable.
Furthermore, Manitoba flour helps the dough hold its structure throughout fermentation and baking. When combined with gentle coil folds, this approach produces focaccia with an airy interior and a crisp olive-oil crust.
With practice, the method becomes simple and consistent. As a result, you can produce bakery-quality focaccia at home with confidence.