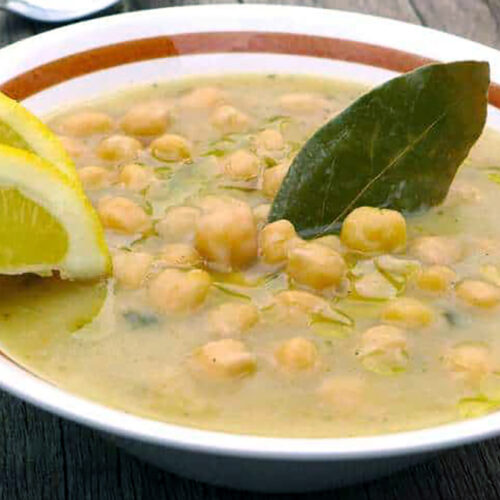
Chickpea Soup
Traditional Chickpea soup(ρεβυθια σουπα)
Equipment
- 1 Pressure cooker Strongly reccommed it to save cooking time
Ingredients
- 500 grams dry chickpeas
- 1 large onion chopped
- 2 cloves garlic
- 1 bay leaf
- 1 tbsp oregano
- 1/2 cup olive oil
- 2 liters cold water
- salt and pepper
Instructions
Chick pea preparation
- Wash dry chickpeas with plenty of water and drain.
- Fill a bowl with enough water to cover the chickpeas and allow them to soak overnight or at least 12 hours before cooking. Add a tablespoon of salt in the water. The salt will soften up the chick peas.
Cooking Instructions
- Drain the chickpeas and rinse very well with cold water.
- Fill the pressure cooker with 2 liters of cold water and place the chickpeas into the pressure cooker. (If using a regular pot follow the same instructions)
- Place pressure cooker on medium to high heat, bring to boil. (If using a regular pot follow this procedure as well)
- Allow to come to a low boil. There will be some foam floating on top of the water. Skim the foam off. Leave on the heat.
- In the meanwhile, chop the onion and garlic. Have all the rest of the ingredients handy.
- Add the onion, garlic, bay leaf, oregano olive oil and pepper, Do Not add salt, just the pepper. Salt can be added to taste when ready to eat. . This is to ensure the chick peas are cooked tender. (If using a regular pot follow this procedure as well)
- Close the top of the pressure cooker and wait until the valve goes up. That is when we start timing the rest of the cooking time. (If using a regular pot it may take more than 90 minutes for a soft, tender chickpea. Keep an eye on the pot and if it needs a little more water, pour in only Hot water. Check tenderness once in a while after 1 hour)
- Once the valve is up in the pressure cooker, lower the heat to simmer and cook for 30 minutes. After 30 minutes take pressure cooker off the heat.
- To release the pressure in your cooker follow the manufacturer's instruction for use. (WARNING - Do Not Open Pressure Cooker until all air is released)
- To make the soup thicker, mix the juice of 2 lemons with corn starch. Whisk well and pour into the pressure cooker. (If using a regular pot, follow this procedure once you have determined the chickpeas in the soup are ready)
- Once this mixture is put into the soup, leave the lid off the pressure cooker or standard pot and place on medium heat for about ten minutes. Once ready, remove the bay leasf. Soup is ready to serve!